Camera 1 works but camera 2 (the EXT position) doesn’t.
Areas to look at include:
| |||
|---|---|---|---|
| Yes | No | ||
Step 1 |
Press the EXT button on the remote. Does the screen image change? | Go to step 3 |
Go to step 2 |
| Step 2 | Has the external video input been turned on in the menu? Refer to your operators guide or see below for instructions on turning EXT IN on. | Go to step 4 | Turn EXT IN on and retest |
| Step 3 | Check the connection between the camera and camera cable and the camera cable and controller. Make sure it is connected properly. Did this fix your problem? | Done | Go to step 4 |
| Step 4 | Unplug the camera cable from the Camera position at the controller and move it to the EXT position. Does the EXT position now show an image? Make sure you’ve selected EXT via the remote. | Go to step 5 | Got to step 6 |
| Step 5 | Place the camera cables back in their original position and move only a working camera to the EXT position. Do you get an image? | Contact your INTEC Service Rep. They may ask you to return your camera for service. | Check the camera cable for damage. It may need to be replaced. |
| Step 6 | Contact your INTEC Service Rep. They may ask you to return your controller for service. | ||
| Note: When using a CVS102 controller you must use the CVR100 remote. If you are not using the correct remote replace and retest. | |||
The default setting for external video in is OFF. To turn it on when using the CVS100 or CVS102 series controllers press the "Menu" and the "UP" arrow buttons on your remote simultaneously. This gives you access to the installer’s menu. When you've done so you should see the screen below:
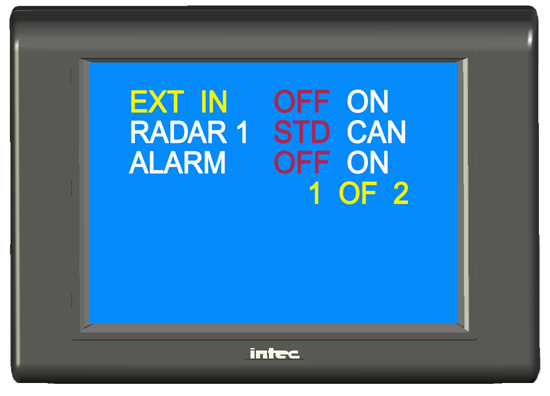
Once you've accessed the installers menu you will already be on EXT IN. Simply press the "Up" arrow button. ON will now be highlighted. Press the EXT button and your external video input should now be displayed.